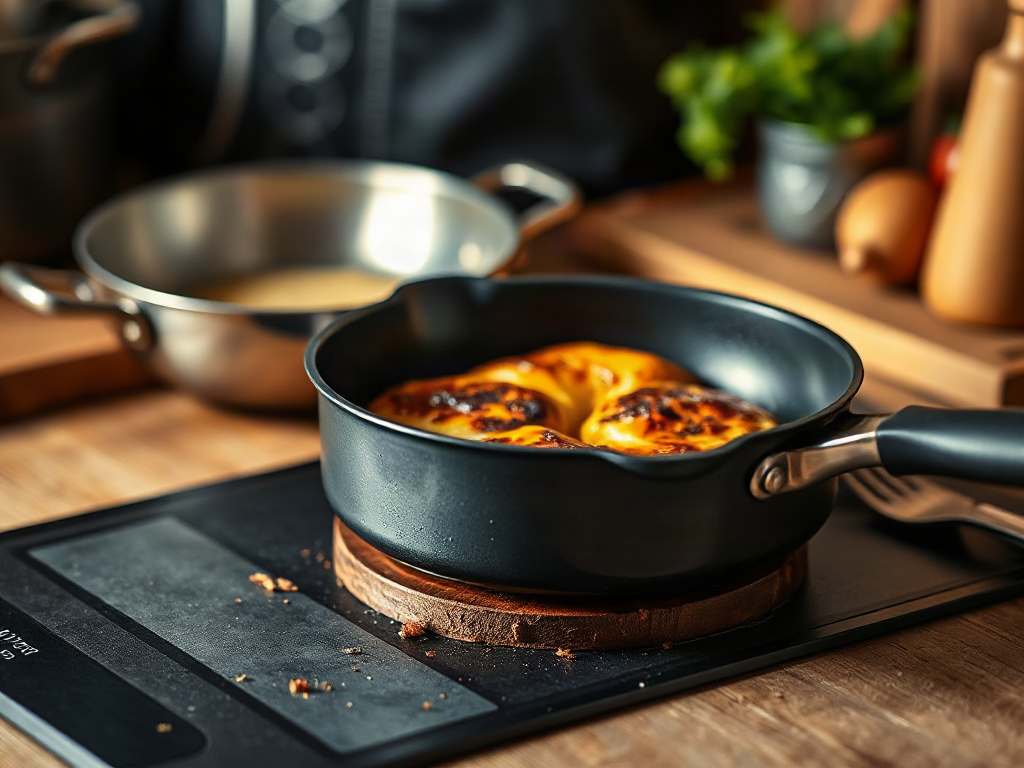
Evaluate cookware for even browning by checking its base, wall thickness, surface condition, size, and response during a controlled test with evenly spaced food. A flat, substantial base usually distributes energy more consistently, while thin or warped pans can create hot spots that darken one area before another cooks. Test a pan over moderate heat with identical slices of bread, potato, or onion, then compare color across the cooking surface. Account for burner size, preheating, crowding, and fat, since poor technique can imitate a cookware defect. Choose the pan that produces similar color and texture across the batch without requiring constant repositioning.
What Even Browning Reveals About a Pan
Even browning depends on how consistently a pan transfers energy to food across its cooking surface. A pan that creates a deep brown patch in the center while leaving the edges pale is distributing heat unevenly, although the result can also reflect an undersized burner, excessive food, or insufficient preheating. The useful question is not whether a pan gets hot, but whether it delivers comparable heat across the area where food actually sits.
Browning occurs when the food surface becomes hot and dry enough for complex flavor and color reactions to develop. Moisture, cold ingredients, and crowded pieces slow that process. A cookware defect becomes more plausible when identical pieces, placed with space between them, brown at noticeably different rates. For instance, four potato slices may show a dark ring over the burner center and weak color near the rim even after they are turned and given similar exposure.
Some suggestions to consider!
Now retrieving an image set.
T-Fal Ultimate Hard Anodized Nonstick Pots and Pans Set 17 Piece, Nonstick Cookware Set with Fry Pan, Saucepans, Saute-Pan, Griddle, Dishwasher Safe, Onyx
$229.95 (as of October 24, 2026 19:20 GMT +00:00 - More infoProduct prices and availability are accurate as of the date/time indicated and are subject to change. Any price and availability information displayed on [relevant Amazon Site(s), as applicable] at the time of purchase will apply to the purchase of this product.)
Now retrieving an image set.
CAROTE Pots and Pans Set Nonstick Cookware Sets 21 Pieces Black | Titanium Reinforced Coating, Scratch-Resistant, Easy to Clean, Even Heating, Induction Compatible, with Frying Pans Set
$89.99 (as of October 24, 2026 19:20 GMT +00:00 - More infoProduct prices and availability are accurate as of the date/time indicated and are subject to change. Any price and availability information displayed on [relevant Amazon Site(s), as applicable] at the time of purchase will apply to the purchase of this product.)
Now retrieving an image set.
Pots and Pans Set Non Stick, 31 Piece Kitchen Induction Cookware & Bakeware Set, Nonstick Kitchen Cooking Pans Set with Frying Pans Set Grill Pan Saucepan Baking Sheet & Utensils, PFOA Free
$139.99 (as of October 24, 2026 19:20 GMT +00:00 - More infoProduct prices and availability are accurate as of the date/time indicated and are subject to change. Any price and availability information displayed on [relevant Amazon Site(s), as applicable] at the time of purchase will apply to the purchase of this product.)Pan geometry matters as much as the advertised material. A broad skillet may offer more room, but a burner that is much smaller than its base can leave the outer zone cooler. A narrow pan on a matching burner can brown food more evenly than a larger, heavier pan used over an undersized heat source. Flat contact with the burner also matters; a slight bulge or warped base may reduce energy transfer in selected areas.
Use how to evaluate cookware for even browning as a comparison process rather than a label-based judgment. Stainless steel, cast iron, carbon steel, aluminum, and clad designs can all perform well or poorly depending on construction, thickness, surface condition, and use. The common mistake is treating material name alone as a guarantee of uniform results.
Inspecting Construction Before Cooking
Start with the base because it is the primary path between the burner and the food. Set the pan on a flat surface and check for rocking, a visible dome, or a gap beneath part of the base. A small amount of movement may be harmless on some designs, but a pan that rocks clearly is a poor candidate for predictable contact heating. On an induction cooktop, a flat magnetic base is especially important for stable energy transfer.
Thickness affects both distribution and responsiveness. Thin metal tends to react quickly but may develop sharp temperature differences above the flame or heating element. A thicker base can spread energy more gradually, reducing abrupt hot spots, though it may take longer to preheat and retain heat after the burner is lowered. That retention is useful for searing, but less convenient when a recipe requires immediate temperature changes.
Clad cookware should be judged by its actual construction rather than the word “clad” alone. A pan may have multiple layers while still concentrating heat in a relatively narrow base. Look for a base that extends across the cooking area, not merely a decorative or thin disk under the center. Rivets, handles, and exterior finishes do not tell you much about browning performance unless they affect flatness, usable space, or handling.
Surface condition changes the test. A seasoned cast-iron or carbon-steel pan with a reasonably smooth, intact finish may release food well, while heavy buildup, flaking seasoning, or a damaged coating can cause sticking that interferes with color development. A nonstick surface may brown delicate food more gently than bare metal, but aggressive heating can damage some coatings and is not a fair way to compare pans. Inspect first, then test under the temperature range the manufacturer permits.
Weight is only a rough clue. A heavy pan can still have a narrow heat path, and a lighter pan with a well-designed aluminum core may spread energy effectively. When comparing two pans, prioritize a flat base, useful base coverage, stable construction, and a cooking surface that matches the burner and the quantity of food you normally prepare.
Running a Controlled Browning Test
A controlled test separates cookware behavior from cooking technique. Use one food, one batch size, one burner, and the same amount of fat for each pan. Thin potato rounds, bread squares, or onion slices work well because their color is easy to compare. Meat can be informative, but its moisture and irregular shape make it harder to use for a first comparison.
Let the pan preheat for the same length of time, using moderate rather than maximum heat. Add a small, consistent amount of neutral oil, then place the food in a single layer with visible space between pieces. Crowding traps steam and can leave every pan pale, so it should not be used to judge heat distribution. Avoid moving the food until one side has had a fair opportunity to color.
Record what happens across the surface. Note whether the center browns first, whether the edge pieces lag, and whether one quadrant produces a darker patch. Turn all pieces once if the food allows it, then compare the second side. A reliable pan does not need every piece to look identical, but the color and texture should fall within a reasonably narrow range without constant shuffling.
Repeat the test after rotating the pan on the burner. If the dark region moves with the burner, the cooktop or burner pattern is contributing to the result. If the dark region stays with a particular part of the pan, the cookware may have an internal hot spot or uneven base. Test on a second burner when possible; a pan that performs well only on one heat source may not be versatile enough for your kitchen.
Use this compact checklist:
- Check the base for rocking, warping, or poor burner coverage.
- Preheat each pan for the same period at moderate power.
- Use equal food pieces, equal spacing, and equal fat.
- Compare center, edge, and quadrant color after the same cooking time.
- Repeat after rotating the pan and, if practical, on another burner.
A common testing error is turning the heat higher when browning appears slow. That may produce darker food but can exaggerate hot spots and hide the pan’s normal behavior. The goal is repeatable distribution, not the fastest possible color.
Interpreting Results and Choosing a Pan
Choose cookware according to the pattern of results and your usual cooking tasks. A skillet that browns a small batch of eggs gently may not be the best tool for a wide steak, while a thick pan that excels at searing may feel sluggish for delicate vegetables. Even browning is one performance criterion, not a universal ranking of every design.
Prioritize consistent color across the active cooking zone, then consider responsiveness. A heavy cast-iron pan may recover well after cold food is added, but it can remain hot after the burner is reduced. A thin aluminum pan may respond quickly yet require closer attention because the center heats faster. Clad stainless cookware can offer a compromise, but its performance still depends on the thickness and spread of its conductive core.
Match pan size to both the burner and the quantity you cook. A large skillet used for two portions may expose broad cool areas and tempt you to increase the heat. A small skillet packed with eight pieces may steam the food. The best choice is often the pan that leaves a little space around the food while keeping most of its base aligned with the heat source.
Do not confuse sticking with uneven browning. Food that adheres strongly may tear when turned, creating pale and dark fragments that make the pan appear inconsistent. Use appropriate preheating, enough fat for the food, and the correct utensil. Conversely, easy release does not prove that heat is even; a slick surface can conceal differences until you test color across several positions.
When shopping, seek construction details, usable base dimensions, care limits, and a return policy rather than relying on vague claims such as “professional heat distribution.” If a pan fails a fair test, try one controlled adjustment—lower heat, less crowding, or a better-matched burner. If the same zone remains markedly darker after those controls, treat that result as meaningful evidence and select another design.
For a broader comparison, connect this assessment with how to evaluate cookware for even browning alongside checks for durability, handling, and cleaning. A pan that browns evenly but is too heavy to lift safely or too difficult to maintain may not be the practical winner. Performance should fit the cook, the cooktop, and the food being prepared.
For additional context, consult the care and heating instructions supplied by the cookware manufacturer, especially when testing coated surfaces or induction-compatible bases. Product documentation can clarify temperature limits, preheating restrictions, and suitable utensils that affect a fair comparison.
Frequently Asked Questions
What food is best for testing even browning?
Uniform potato slices, bread squares, or onion pieces are useful because their color is easy to compare. Use pieces of similar thickness and leave space between them.
Does a heavier pan always brown food more evenly?
No. Weight may indicate greater thermal mass, but base coverage, flatness, burner fit, and internal construction matter more than weight alone.
Why does the center of my pan brown faster?
The burner may concentrate energy in the center, or the pan may distribute heat unevenly. Crowding, insufficient preheating, and a pan that is too large for the burner can contribute.
Should I test cookware on high heat?
Moderate heat is usually more informative and safer for comparison. High heat can exaggerate hot spots and may exceed the care limits of coated cookware.
Can a nonstick pan produce good browning?
Yes, although browning may be gentler than in bare metal. Judge the pan by consistent color at an appropriate temperature, not by the surface type alone.
Conclusion
Reliable browning comes from a partnership between cookware, burner, food spacing, and temperature control. Begin by checking that the base is flat, stable, and appropriately sized for your heat source. Then run a repeatable test with uniform food, moderate preheating, equal fat, and clear spacing. Compare the center with the edges, rotate the pan, and separate cookware behavior from a burner or technique problem. Give greater weight to repeatable color distribution than to marketing language, extreme weight, or a material label by itself. The most useful pan is the one that matches your normal batch size and lets you brown food evenly without constant repositioning or risky heat escalation.